A colleague's customer recently had a requirement to host both DMZ and Production workloads in VMware Cloud on AWS while ensuring that traffic is segregated during transit. Currently, if the customer was to deploy DMZ and Production networks attached to the default Compute Gateway (CGW) Tier-1 then that traffic would be routed by the Tier-1 and thus violate the segregation required as per below:

In SDDC version 1.18 we introduced the ability to deploy multiple compute gateways (Routed, NAT'ed or Isolated) More information can be found in the release notes and this blog article.


We first needed to create the DMZ NAT'ed Tier-1 which is very straightforward. I would recommend using the NSX Manager UI via the Cloud Service Portal (CSP) as it is more feature rich that the current CSP UI. To access simply click on the Open NSX Manager button:
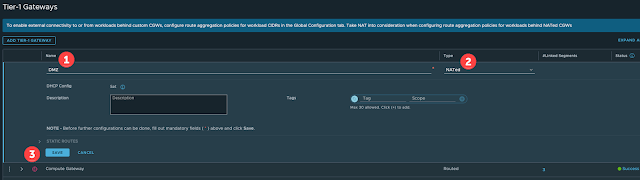
Once inside the NSX Manager UI navigate to Networking -> Tier-1 Gateways and click Add Tier-1 Gateway:

You can also create the required network segments that need to be attached to the DMZ NAT'ed Tier-1 but this is not required to establish the VPN so I won't be covering that.
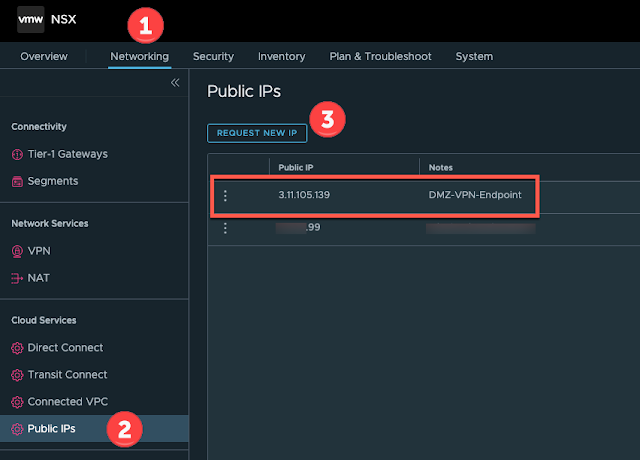
We now need to request a public IP address from AWS that can be used to create a VPN endpoint on the NAT'ed Tier-1. Navigate to Networking -> Public IPs and request a new IP ensuring you give it a suitable name. The IP address will be allocated by AWS automatically once you click save:
You should not be able to ping this address just yet because we need to ensure we allow traffic on the internet interface and create the required NAT rule and VPN Endpoint. Let's create the VPN Service and Endpoint first.
Navigate to Networking -> VPN -> Tier-1 -> VPN Service and add a new IPSec service:


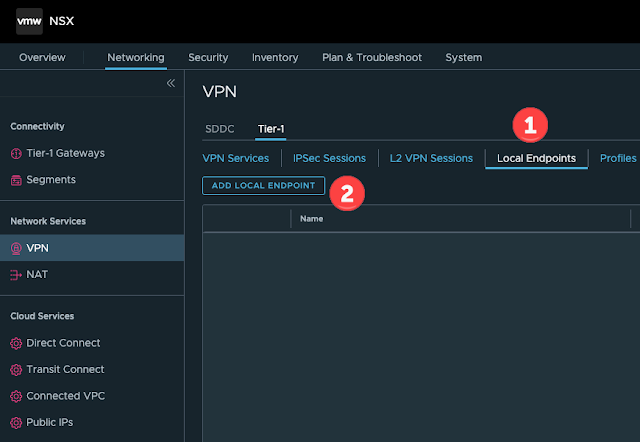
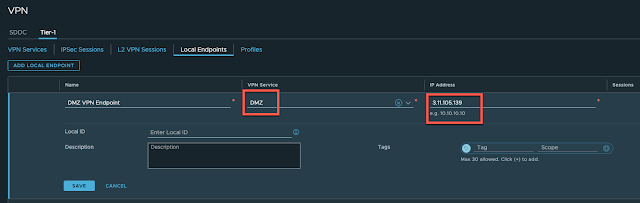
Now click Local Endpoints and Add Local Endpoint:
Provide a suitable name and ensure you link it to the recently created VPN Service and provide the public IP address that was allocated by AWS:

We now need to allow the traffic in via the internet interface so the VPN can be established from outside the SDDC. Navigate to Security -> Gateway Firewall -> Compute Gateway and click Add Rule:

Give the new rule a suitable name if needed, lock it down to only the public IP of the remote VPN endpoint. In my example I am just going to use a source of ANY with a destination of the VPN Endpoint public IP address on ANY service:


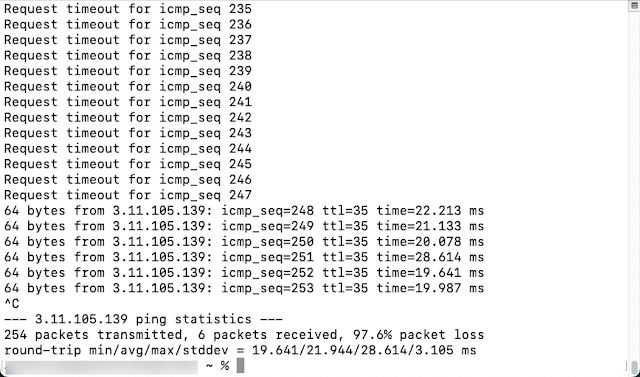
Once you click save you should be able to ping the public IP address providing you allowed ICMP. For this example, I just allowed all traffic:
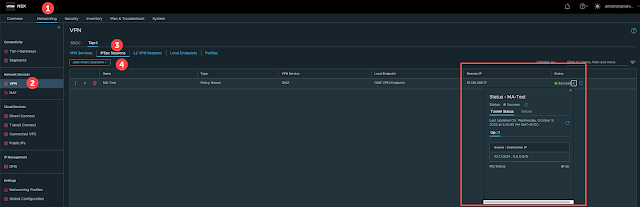
Now we should be able to create a new VPN session via Networking -> VPN -> Tier-1 -> IPSec Sessions and also at the remote side to establish an IPSec tunnel:
No comments:
Post a Comment